With most set up boxes, you don’t get the freedom to configure the device the way you like. You’ve got to run some specific software and use them to enjoy streaming on such boxes. So, when MAG322 came out in the market, it changed the game forever.
Its unique open platform lets users make changes and use any software they liked on the device. And yes, you can even set up a MAG322 for IPTV, which is why this powerful set-top box stands out from the rest.
Today, we will see how you can do that in just a few steps and give you a detailed guide to follow along with the steps. So, if you’re ready, let’s get on with it.
Set Up a MAG322 for IPTV
To set up your MAG322 for IPTV, you don’t need to do a lot. You’ve got to just follow a few steps below, and you will be good to go.
Here they are:
Step 1: First thing you’ve got to do is connect your MAG to the internet.
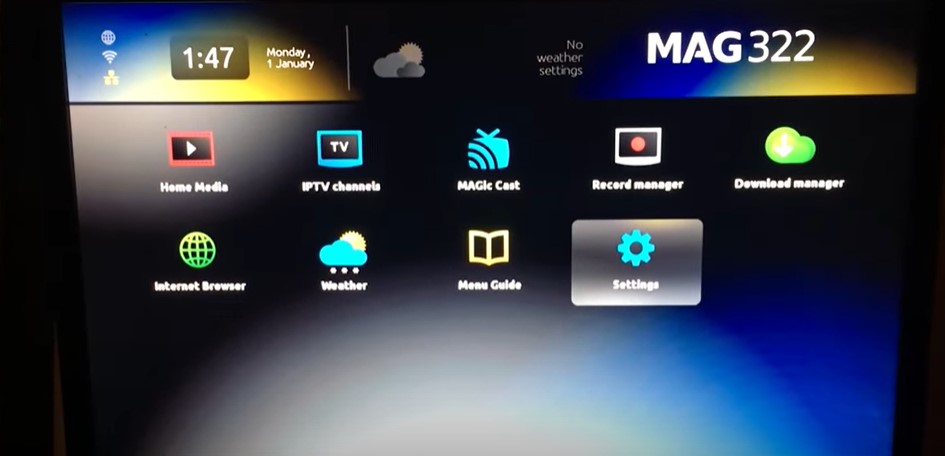
Step 2: Once connected, go to the menu on the device and then to the settings to find the system settings option there
Step 3: Now, from the system settings option, find the options named servers. Choose it and go to portals, and then you will get sent to portal 1. You need to reboot the portal after setting it.
Step 4: After getting done with all the above steps, you need to find the reboot device option and reboot it.
If you’ve followed all the steps to the tee, then all you need is to wait till the TV shows you the channels list after it reboots. And when it does, you will press the button “1” and confirm pressing the “OK” button if there isn’t any channel in the list.
More detailed set-up instructions
For enjoying IPTV on a set-top box, the MAG322 is one of the best in the business. The performance it offers is unlike any other Android TV box out there. With it, you can get support for HEVC files that are quite compressed to lower the network load. Using it, you can enjoy the IPTV content on it in much better quality.
The high-quality chipset and the RAM offer IPTV streaming, unlike no other. Not only the quality of the image improves, but the audio output is also much superior. The HDMI 1.4b gives you the perfect picture and sound to make the most of it.
If you’ve got that system in your home, you can follow the steps mentioned above to get the IPTV streaming working on it in no time. But if you’re still facing some trouble getting it working, then this detailed set-up guide might help you with that.
The first thing you need to look for is the MAC address of the set-top box. You will be able to find that underneath it as it should be labeled there. You will need that address for set-up. So, note it down on paper.
Then you need to follow the mentioned steps here. Go to the menu, then find the setting and then get to the system settings option from there. You will need to find the network option and choose whether the wired or wireless depends on the type you’re using in your home.
You will be then get connected to the internet. You will then follow the earlier steps mentioned in the steps by step instructions and reach the portals section.
Now, to use the IPTV, you obviously need the IPTV membership from AzimIPTV or other services you’re looking to use. Once you subscribe to one of the IPTV service providers, they will prove you a portal URL.
This is the part where you need to enter the URL in the set-top box setting. When you do that, you will require to register your MAC address. This will be done by the provider. For instance, if you’re getting the AzimIPTV subscription, you will give them the MAC address you’ve written down before. They will register it to ensure that you can use IPTV using your box.
Once you’ve done with the process, you will go back to the menu and find the option to change the video resolution. You should select the resolution that your TV uses in the setting. If you’re aware of the detail, you can always use the Auto-selection, which will take care of it for you. You’ve got to repeat the same process for the graphic resolution. After all these things get done, press OK to save the settings.
The next thing you need to do is exit and find the restart portal option. Click that and wait for it to restart. If you’ve got the thing right, things should load up on the screen. You can be sure of that by seeing a loading bar on the screen, which means that your MAC address got registered. But suppose any message pops up to call the provider or asking for login authentication, then you still need to register your MAC address. Just contact the IPTV provider and get this sorted.
If you haven’t got a subscription, doing anything won’t matter as you need one to use the IPTV on the box.
Why use MAG322 for IPTV?
There are many other options which you can use for IPTV, so why go for the MAG322. It is quite an obvious question to ask and a good one. If you look at the benefits the MAG can offer for enjoying IPTV services, it is far superior to the rest.
With most services setting up, the IPTV on the set-up box isn’t that easy. Some even don’t offer the option. But this one allows you to do that. But more importantly, the updates you get with it is much faster and more frequently.
The scrolling through the menu or other IPTV menu using the MAG322 is quite seamless. You don’t feel any lag or anything, which is why this is a top pick for many to enjoy IPTV services.
Frequently Asked Questions (FAQ)
How to get IPTV portals?
To get the IPTV portal, you first need to subscribe to a provider. Only then you will get the link.
What to do when you can’t change the portal?
If you face any issue changing the portal, you can reset the box and set-up it again to see if the problem gets fixed. Still, if you face any difficulty, then you should contact the provider for help.
How to reset parental control on the MAG322?
To reset parental control, you need to choose the user tab and then go to the users’ list. Then select a user and edit. Then unfold the info in the tab device of the user profile to reset.
Conclusion
Hopefully, you will be able to set-up a Mag 322 for IPTV following the instructions above. But if there is an issue even after following the steps, then you should contact your service provider; they will help you to get it set-up.